A meeting audio check should take about five minutes and produce three facts: the intended speaker plays a known signal, the intended microphone captures intelligible speech, and the meeting application uses those same devices. The checklist below is deliberately platform-neutral, with links to detailed Teams and Zoom procedures where the application differs.
Quick answer
Connect the equipment you will actually use. Run the Speaker Test, then the Microphone Test and listen to a short local recording. Open the meeting link early, confirm the app’s speaker and microphone selections, and use its built-in test or pre-join preview. Keep a wired headset, laptop audio, or authorized phone dial-in as a backup for a critical call.
Do not wait until participants arrive. A successful meeting test is easier when you can stop, change one control, and repeat the same step without pressure.
Five-minute preflight sequence
Minute one: simplify the route
Connect the headset, USB microphone, or speakers you intend to use. Disconnect idle Bluetooth devices and monitors that could become the default output. Check hardware mute switches, cable seating, power, and battery. Set output to a moderate level.
Choose a quiet position and place the microphone where it will remain during the call. Moving a laptop or boom arm after testing can change level and room noise.
Minute two: verify the speaker
Open the Speaker Test and play its controlled signal. Confirm the sound comes from the intended physical device. Run left and right once if you use stereo headphones. A sound from the laptop does not validate the headset simply because both are nearby.
If there is no sound, use the guided diagnosis rather than opening random app menus. The meeting app cannot repair a powered-off speaker or system route pointed at a monitor.
Minute three: verify the microphone
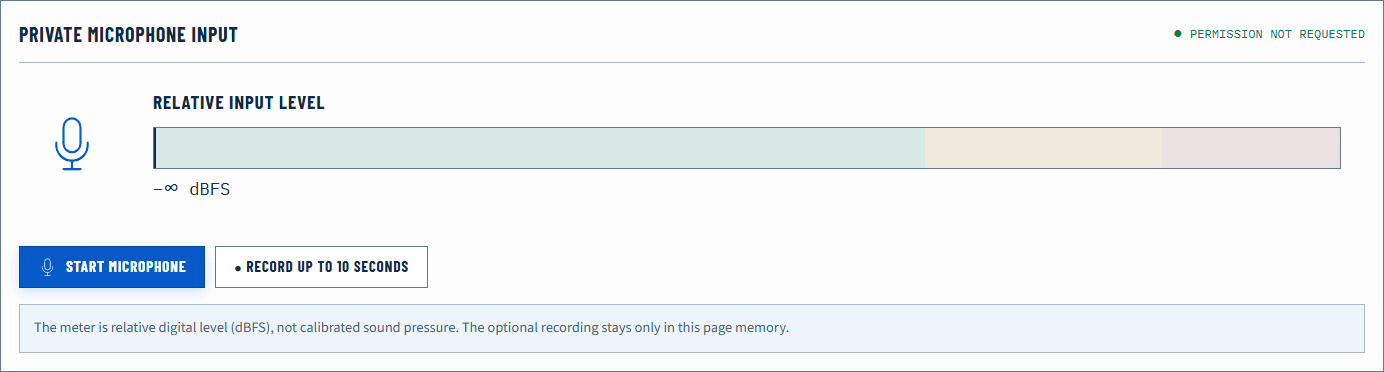
Open the Microphone Test and grant access only when prompted. Speak one complete sentence at your normal distance. The relative meter should respond without sitting at its maximum, and the local playback should be intelligible. This recording remains in memory and is not uploaded.
If the wrong microphone responds, select the intended input in the operating system before joining. Laptop arrays, webcam microphones, docks, and headsets can all appear simultaneously.
Minute four: verify the app
Open the meeting application or link. Select the same speaker and microphone explicitly. Use the app’s supported test feature or pre-join controls. The exact feature differs by client and account:
| Application | Useful check | Important limitation |
|---|---|---|
| Microsoft Teams | Device settings, pre-join controls, and Test Call where available | Test Call availability varies by client, account, and policy |
| Zoom | Audio settings tests and official Zoom test meeting | A local pass cannot predict later network conditions |
| Google Meet | Pre-call device choices and browser permission checks | The browser site permission is part of the path |
Use the Teams procedure or the Zoom procedure for detailed steps. Keeping this checklist brief prevents duplicate, potentially stale interface instructions.
Minute five: prepare a fallback
For an important meeting, decide what you will switch to if the primary route fails. A simple wired headset often removes Bluetooth profile and battery variables. A laptop’s built-in mic can serve temporarily if the USB interface disconnects. Use phone dial-in only when it is authorized and available for the meeting.
Place the fallback within reach but leave it disconnected unless needed. Connecting it after the app is open can change defaults, so verify device names again if you do switch.
Interpret what fails
| Observation | Most useful conclusion | Next step |
|---|---|---|
| Browser speaker test is silent | Wider system or hardware issue | Check output selection, power, mute, cable, and Bluetooth route |
| Browser speaker works; app test is silent | App routing or per-app volume | Select output in the app and inspect the operating-system mixer |
| Browser microphone is flat | Input, connection, or permission issue | Check system input and privacy access |
| Browser mic works; app mic is flat | Wrong app input or app permission | Select the mic in the app and reopen after permission changes |
| Both local tests pass; remote users report breakup | Network, app processing, or remote path | Compare a test meeting and a more stable connection |
| Headphone quality drops when mic opens | Bluetooth profile transition | Try a separate mic or wired output |
This matrix prevents a common mistake: treating “participants cannot hear me” as proof that the microphone itself is dead. A local capture proves the microphone can reach one software path; the app test shows whether the meeting path is configured.
Control level, room, and echo
Use moderate speaker level when an open microphone is nearby. Loud speakers feed the room and can make echo cancellation work harder. Headphones reduce that acoustic loop and are usually the simplest route in a shared or reverberant space.
Do not interpret a meter as a calibrated loudness measurement. Digital meters show relative signal level. Speak naturally and preserve headroom rather than trying to make every peak touch the top. If you want the technical explanation, see What Is dBFS?.
Noise suppression can help steady background noise but cannot repair a distant microphone or a rattling cable. Establish clear raw placement first, then evaluate processing in the meeting app one option at a time.
Browser and privacy limits
A browser needs microphone permission to run an input test. Permission should be requested by an intentional action, and a denial should be resolved through the browser’s site controls rather than repeated prompts. Online Sound Test processes the meter and short recording locally; it does not upload the recording or place it in test history.
The speaker test cannot listen to your room. You confirm which device played and how it sounded. A local pass also cannot guarantee a later remote connection, because network and meeting-service conditions are outside the controlled signal.
Prevent echo and double connections
When two computers or a computer and phone join the same meeting in one room, their open microphones and speakers can form an acoustic loop. For a planned two-device presentation, keep audio connected on only one device unless the platform provides a documented companion mode. Mute is not always enough if a device later unmutes automatically or reconnects.
Headphones are the quickest controlled comparison for echo. If echo disappears when speakers are replaced by headphones, the acoustic path—not the internet connection—is involved. Lowering speaker level and increasing the distance between speaker and microphone can also help, but repeat the app test after each change.
Network trouble sounds different from acoustic echo. Dropouts, robotic speech, and long gaps can follow an unstable connection, while a repeated delayed copy of a voice usually indicates another playback-to-microphone path. Describe the pattern before switching devices.
Keep the checklist reusable
For a recurring desk setup, record the normal input and output names, microphone position, and fallback route. Re-run the five-minute check after operating-system updates, meeting-app updates, a new dock, or a Bluetooth pairing change. Do not assume a previous pass survives a changed route.
On shared equipment, restore only the settings you changed and leave a brief note for the next user. Avoid storing test recordings that include personal or workplace information. The goal is a repeatable procedure, not a collection of captured calls.
If the platform offers a network-quality indicator, inspect it only after local input and output pass. A healthy network indicator cannot prove the selected microphone is correct, while a poor connection cannot explain a speaker that fails the local browser baseline.
Final readiness check
Stop other audio, close apps that may claim the microphone, and open the actual meeting link. Confirm the displayed input and output one last time. Join muted unless you are expected to speak immediately, but know where the unmute and device menus are.
If something fails after the meeting begins, describe the observation precisely: “I hear others, my app input meter is flat, but the browser mic test passed.” That statement isolates the likely layer. Once the call ends, repeat the same baseline and use the sound diagnosis to preserve a reproducible path instead of relying on memory.
Official sources
Application and operating-system controls can move. These primary references are the update baseline for this guide.